

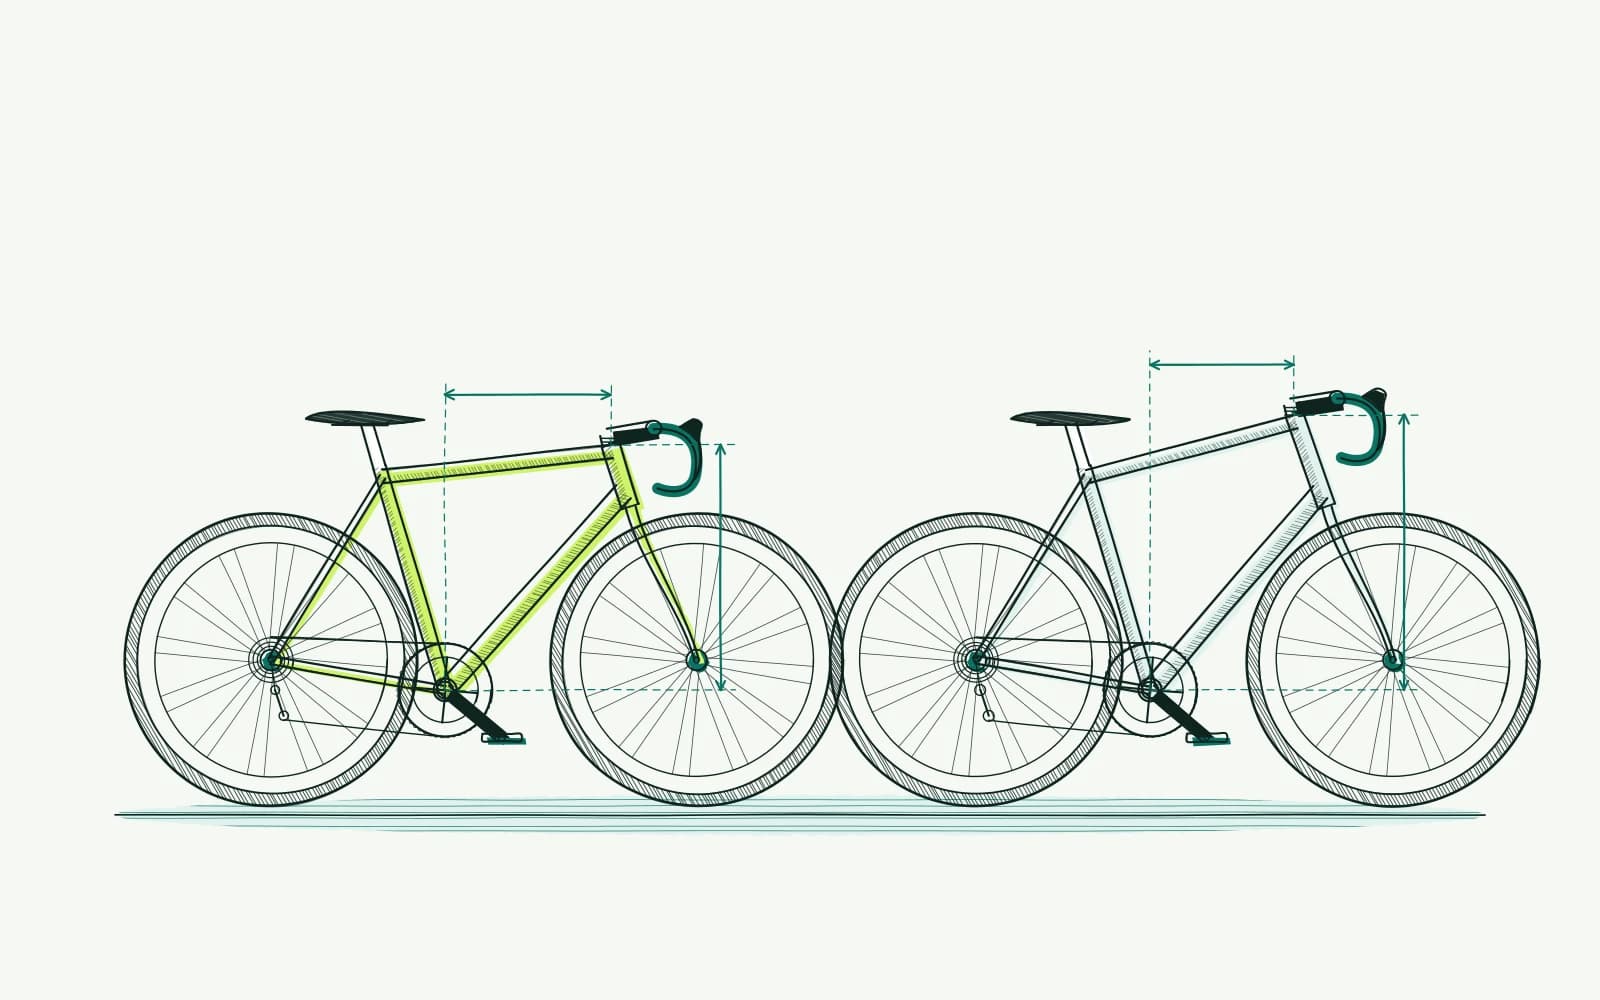
The problem: comparing bike size and geometry
You currently ride a medium, but another brand suggests a size 54. A sizing chart puts you exactly between two options. Meanwhile, someone says a smaller bike is always more sporting. That makes the decision unnecessarily confusing when you mainly want to ride comfortably.
A size label is a useful description within a model range. It does not describe every distance you experience on the bike. Even two bikes with the same label on their seat tubes can feel different. The fitted components change things further.
Perhaps your current bike feels good and you want to transfer that position. Perhaps you want less distance to the bars instead. Make that goal clear first. Otherwise, you compare numbers without knowing which difference you need.
This guide helps you prepare a comparison so a test ride or discussion with a fitter becomes more focused.
Background: what stack and reach tell you
Stack is the vertical distance between the bottom bracket and the top of the head tube. Reach is the horizontal distance between those same reference points. They describe the frame independently of a sloping top tube. Always check the manufacturer's measurement definition, especially with integrated components.
Your hand position sits further along. Spacers, stem, bar shape and brake hoods add to the frame dimensions. A frame with identical reach can therefore produce a different hand reach. Stack is not the same as handlebar height either.
Compare the complete build when transferring an existing riding position.
At the rear, saddle height, seatpost and setback matter. Seat tube angle affects where the seatpost sits. The saddle rails have a limited adjustment range. Use that range to position your seat, not to hide an unsuitable handlebar distance.
Standover height and clearance above the top tube are separate measurements. They help you check practical use of the bike. Shoe clearance, tyre clearance and intended riding also deserve attention. No single ratio proves that the entire package is suitable.
Online information can make those differences visible on paper. It cannot tell you whether operating the controls feels comfortable on a descent. A suitable stem also needs to be available and permitted. Treat a calculated frame size as a selection aid.
Your final choice needs a check of the bike as you will actually use it.
How to approach it with bike fitting
-
Describe your starting point: Record your current bike's brand, model, model year and size. Write down what feels good and what you want to change. Use concrete observations such as reaching, sliding forwards or difficult braking.
Keep a side photograph of the whole bike. A size label without its model year is insufficient for a reliable comparison.
-
Collect the official geometry: Find stack and reach in the table for that exact size and version. Record millimetres and retain the measurement definition. Do the same for each candidate.
Do not use a chart for an almost identical model. Check whether a listed dimension describes the frame or the complete bar position.
-
Measure your contact points: Stand the bike upright on level ground and use a tape measure and spirit level. Record saddle height from the bottom bracket. Measure bar height and horizontal distance using consistent reference points.
Also record stem length, spacers and bar shape. Repeat uncertain measurements before drawing conclusions from a small difference.
-
Check adjustment room: Ask which stems, seatposts and spacers are permitted on the candidate. Compare minimum and maximum markings in the component instructions. Do not rely on a future modification outside those limits.
Use the frame size calculator as another starting point alongside these details, not as a replacement for checking them.
-
Compare the built bike: Have a candidate safely adjusted to the agreed starting position. Change one setting at a time and record the difference in millimetres. Comparing models is not a reason to cut components immediately.
If you can borrow the bike, compare two to three easy rides in similar conditions, provided you remain symptom-free.
-
Assess the result and its limits: Check reach, braking, steering and seating, rather than just how low the bars sit. If things worsen, return to the recorded safe position. Ask a fitter for help if you repeatedly reach adjustment limits.
Seek medical assessment for pain at rest or during the night, swelling or radiating tingling. If position-related pain persists after three to four careful adjustments, seek guidance; do not wait that long with lost sensation.
Further reading
- Race versus endurance geometry helps you compare the intended riding position without relying only on a sales category.
- Stem length explains why frame reach and the distance to your hands are different measurements.
- Crank length discusses a component that changes your pedalling movement without changing frame size.
- Online bike fit limitations helps you decide when measurements on paper provide insufficient confidence.
- The frame size calculator gives you a starting selection, after which you check geometry and adjustment room separately.
Frequently asked questions
Can I use my current size label with another brand?
Use it only as an initial search direction. Then check model year, geometry and fitted components. A size label has no fixed universal meaning. Compare your current contact points with the possible build of the new bike.
That compares the position you will ride, rather than just its label.
Is the smaller option better when I fall between sizes?
You cannot establish that from a sizing chart alone. The smaller option may offer different bar height and adjustment room. The larger one may start too long. Compare both complete builds and seek guidance if either option immediately puts you at an adjustment limit.
Are identical stack and reach enough for the same position?
No. Stem, spacers, bar shape and brake hoods help determine where your hands land. Saddle position also needs to match. Identical frame dimensions simplify the comparison but cannot replace checking your contact points.
Remember that the chosen components must also be installed within their permitted limits.
Must I perfect my old bike before comparing replacements?
You do not need to prove a perfect position before comparing bikes. Record what works and what you want to change. With existing symptoms, assessment beforehand is often more useful than guessing at another size. Bring your measurements and symptom notes to the discussion or test ride.
This guide covers one part of your riding position. Read how bike fitting connects your measurements and bike setup.
Find an initial size range, then check the geometry of your candidates.
Calculate your frame size