

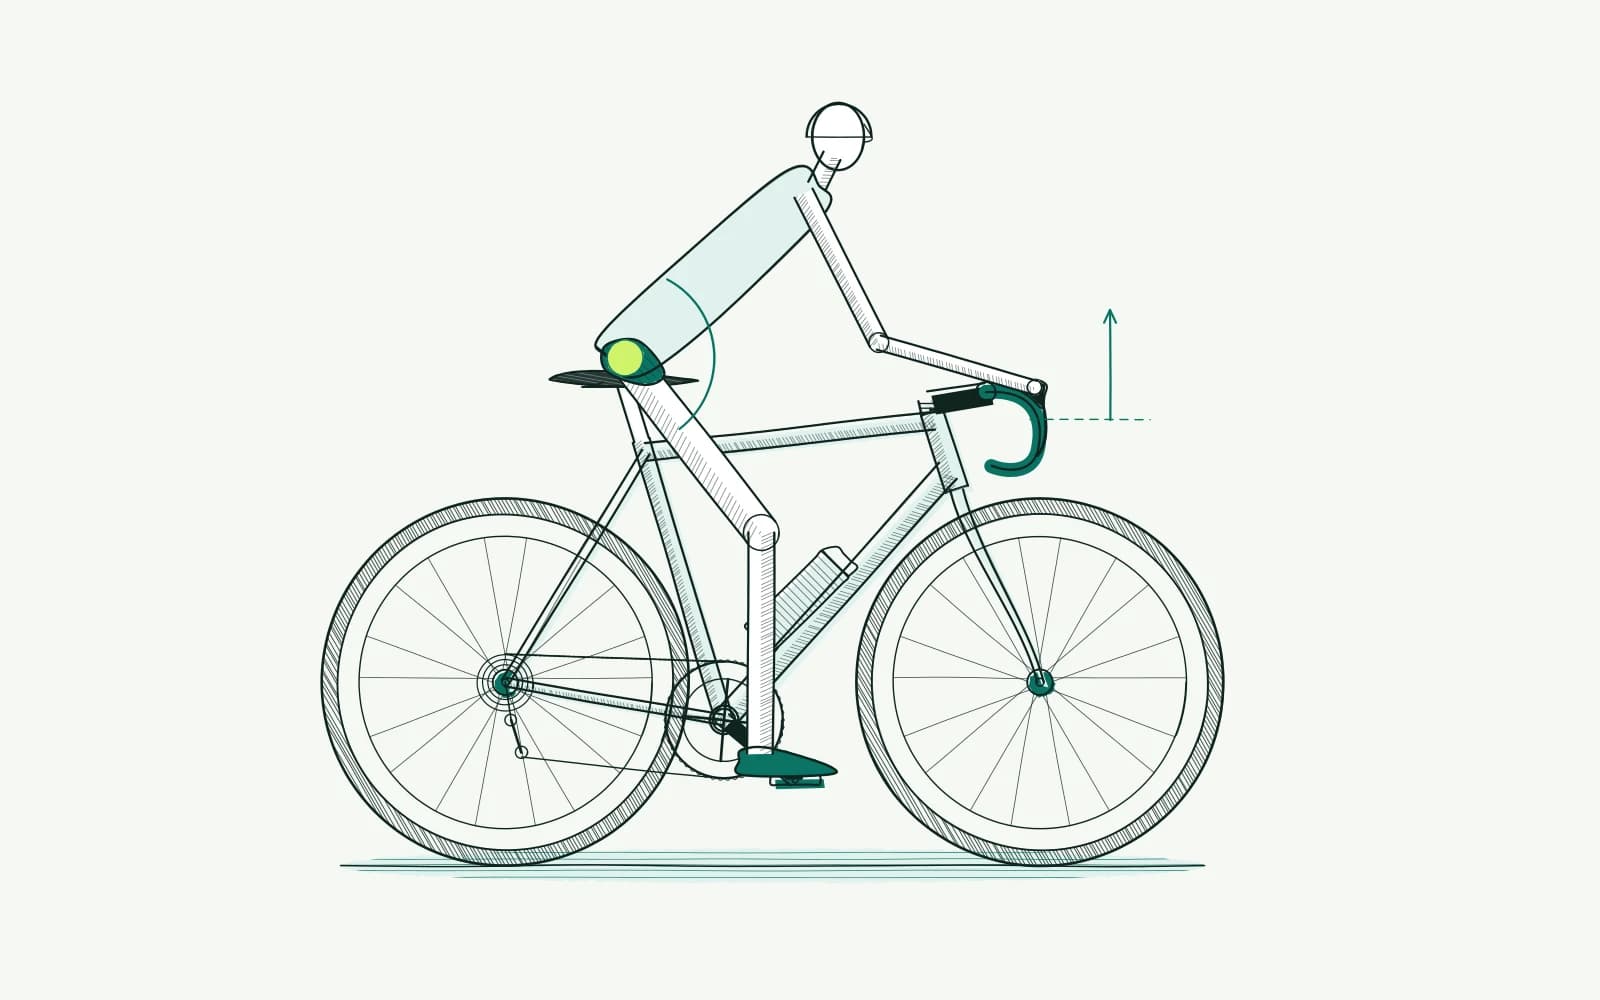
The problem: bike fit limited flexibility
You can ride comfortably on the bar tops, but the brake hoods feel distant. In the drops, you have to squeeze yourself smaller. Perhaps you lift your shoulders to look ahead. A position that looks ordinary in a photograph feels forced on your own bike.
You might notice this as soon as you get on. Sometimes discomfort appears only after staying in the same position longer. Record that difference before moving components. A difficult position from the start needs a different comparison from discomfort following fatigue.
Perhaps you call yourself stiff because you cannot touch the floor with straight legs. That isolated exercise does not tell you which handlebar height you need. The useful question concerns movements you can manage on the bike. Can you look behind, brake and pedal calmly without holding yourself rigid?
Background: space between your torso and thigh
Your thigh moves closer to your torso with each pedal stroke. Your riding position influences the space you experience there. Low or distant bars require a different upper body position from higher, closer bars. That does not mean everyone needs the same upright position.
A hip angle in a stationary photograph tells only part of the story. Your pelvis can move and your hands may support you differently once you pedal. Your view ahead and access to the brakes matter too. Assess what you can actually use while riding.
Saddle and bars work together, but serve different purposes. The saddle supports your seating relative to the pedals. The bars need to remain reachable from that seat. Simply sliding the saddle forwards shortens the distance, but also changes your relationship to the pedals.
The bike also has mechanical limits. Bars cannot rise indefinitely, even if your position seems to require it. Steerer length, permitted spacers and cable clearance restrict the options. A mechanic can check which changes your components allow before you choose an adjustment.
Your movement may also feel different after a busy day or demanding ride. Record those circumstances alongside your bike measurements. An online calculation cannot examine that experience or explain a physical limitation. Treat its result as a starting point, never an instruction to hold a painful position.
How to approach it with bike fitting
-
Describe what works.
Record which hand position feels comfortable and which movement becomes difficult. Note whether you can reach the brakes safely. Choose a familiar, quiet route for the comparison. You do not need to provoke pain to describe a useful starting situation.
-
Measure before changing anything.
Use a tape measure and spirit level on level ground. Record saddle height, the height difference between saddle and bars, and distance to a fixed point on the hood. Take a side photograph and name your reference points. This makes later measurements comparable and helps you restore the previous position.
-
Check your seating first.
See whether you can stay in the same place without sliding towards the bars. Ask a fitter to observe if you cannot. The bike fit calculator helps organise body measurements and your starting position. Its calculation does not assess how much bending your body can safely tolerate.
-
Choose one handlebar question.
If height is the main concern, have the permitted increase checked. A 2–5 mm step is a cautious comparison example where the system allows it. This is not a medical prescription. If distance is the issue, discuss the stem and hood position without simultaneously moving the saddle.
-
Check installation and try gently.
Follow manufacturer limits and torque settings; leave uncertain installation to a mechanic. Check free steering, cable clearance and brake operation. Then compare two to three easy rides using the same hand positions and similar effort. Stop sooner if symptoms appear; you do not need to finish a test ride.
-
Assess usability and warning signs.
Record whether looking behind, braking and pedalling stay easier. If things worsen, return to the recorded safe starting position, with help when needed. Do not force greater bending to make the new position work. Have persistent symptoms assessed after three to four careful adjustments, by a fitter and a clinician where appropriate.
Stop experimenting for pain at rest, night pain, swelling or radiating tingling. Seek medical assessment instead of waiting for the remaining test rides. New loss of sensation also needs assessment. Different handlebars cannot explain an unresolved physical symptom.
Further reading
- Lower back pain cycling: check your position calmly helps you record symptoms without diagnosing their cause yourself.
- Endurance bike fit: comfort over distance explains how to assess a usable position over longer rides.
- Road bike fit: your three contact points connects seating, hand position and pedals within the same check.
- Bike setup measurements: record your position helps you choose reference points you can reliably find again.
- The bike fit calculator organises body measurements as a starting point for comparison on your own bike.
Frequently asked questions
Must I become more flexible before adjusting my bike?
You do not need to wait for future movement capacity. Choose a position that feels usable and stays safe now. If you also want to work on movement, discuss physical limitations with an appropriate professional. Revisit the position later only when your riding experience gives you a reason.
Is a straight back the goal on every bike?
A photograph showing a particular back shape is not a personal prescription. Focus on whether you can move comfortably and reach the controls. A fitter can observe your position while pedalling. Avoid deliberately stiffening yourself to copy a reference photograph; that makes your comparison less useful.
Do I need a different bike immediately?
Not automatically. First establish which safe adjustments your current bike permits. Sometimes the existing build offers enough room; sometimes components reach their limits.
Take your recorded measurements when comparing bikes. You can then assess another bike against your own usable position rather than relying on its appearance.
Must I always be able to use the drops?
You do not need to hold an uncomfortable position for long periods. You do need safe braking and steering in positions you use. Discuss unreachable controls with a fitter or mechanic. Riding only on the tops does not automatically solve that mechanical problem, particularly when descending.
This guide covers one part of your riding position. Read how bike fitting connects your measurements and bike setup.
Record your starting position and use the calculator to prepare your next check.
Calculate your bike fit