

The problem: foot measurement cycling
Your everyday shoes fit, but your toes feel squeezed on the bike. Perhaps you tighten the closure to hold your heel more securely. Your forefoot then feels even tighter. A larger size seems logical, although the important difference may concern width or shape rather than length.
Record where pressure appears: over the foot, beside the little toe, under the forefoot or behind the heel. Also record when you notice it. Do symptoms begin immediately after fastening the shoe, or only during longer efforts? That distinction helps when trying shoes, without providing a diagnosis by itself.
Do not measure only the foot you believe is larger. Left and right can differ. An old insole mainly shows where you stood previously. It does not automatically establish which length, width or shape your new shoe should have, or whether its closure will suit you.
Background
Shoe sizes are not universal length measurements. The same number can fit differently across brands. Even one brand may use different lasts: the shapes around which shoes are constructed. Measurements in millimetres are therefore more useful than remembering only your usual shoe size when comparing models.
Length and width deserve separate attention. Adding length to relieve pressure at the sides may leave your heel less secure. Tightening the closure afterwards can create pressure elsewhere. Check the complete fit rather than concentrating exclusively on the space in front of your longest toe.
Your foot outline depends on how you stand. Measure under load, sharing weight comfortably between both feet. Keep the pencil upright beside the foot. An angled pencil produces a different outline from an upright one, even though the foot itself has not changed size or shape.
The shoe is only one part of your contact with the pedal. Socks, insoles, closures and cleat position also matter. A suitable foot-length measurement does not prove that pedal position is correct. Equally, changing a cleat will not automatically make an excessively narrow shoe appropriate for your foot.
Use the allowance recommended by the shoe manufacturer, rather than a universal addition from another brand’s chart. An online tool can organise measurements. It cannot feel whether a seam presses, your heel moves or a closure becomes uncomfortable under load. Physical fitting remains part of the process.
How to approach it
-
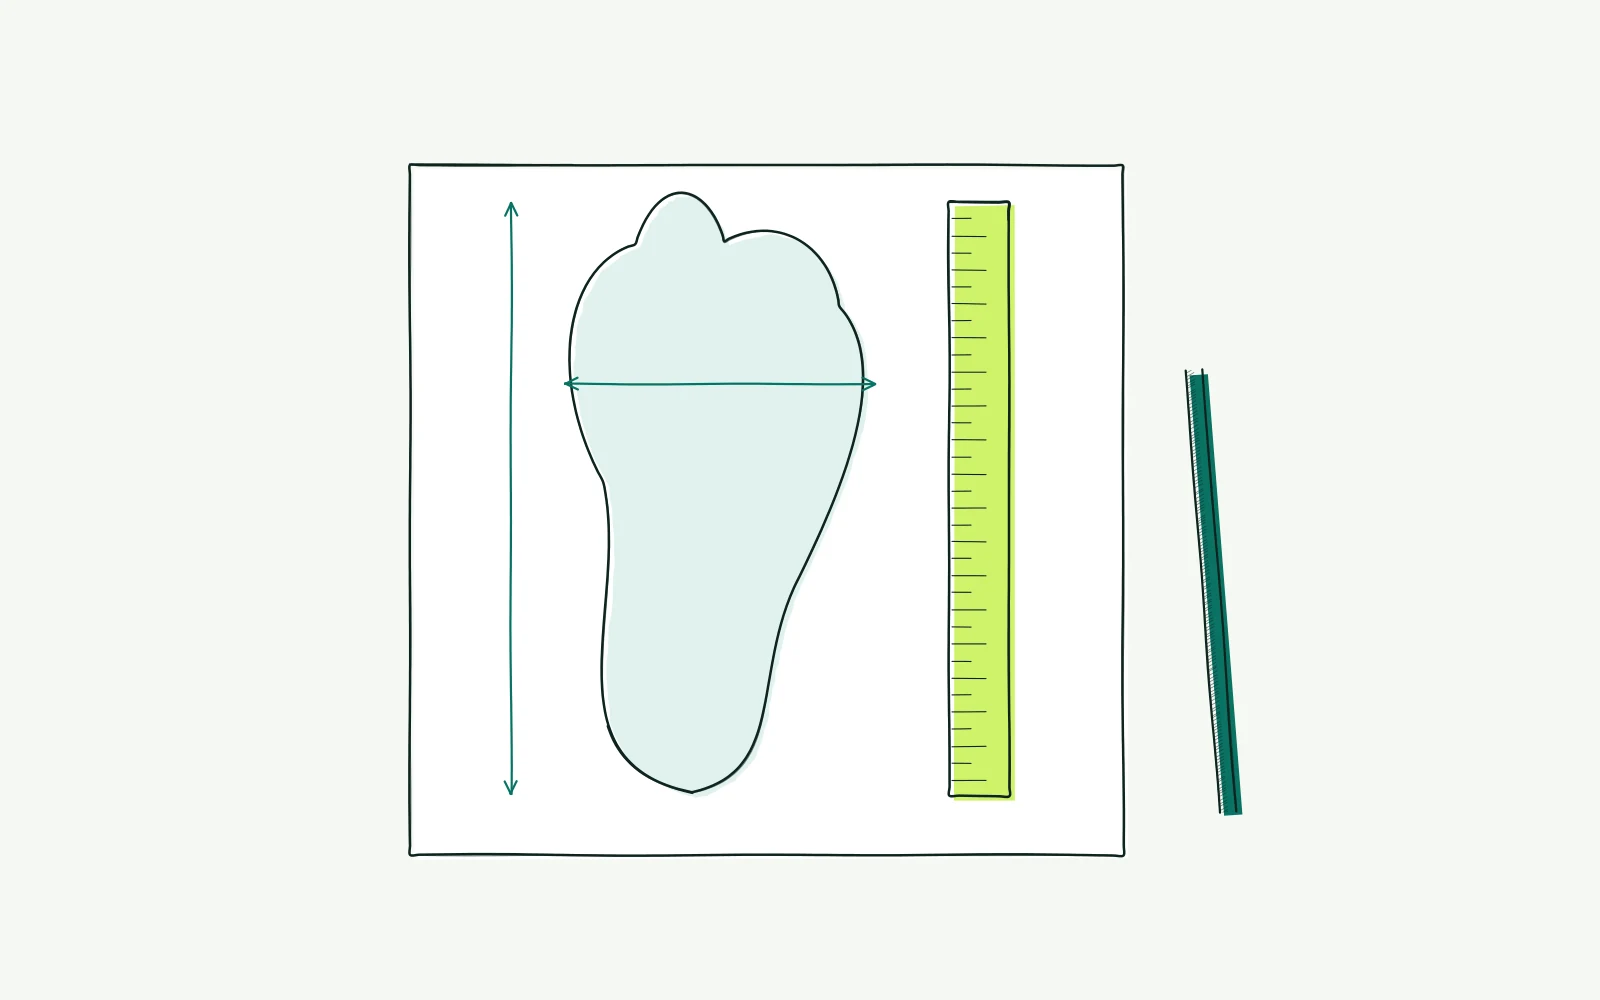
Place paper against a straight wall on a hard, level floor. Use a tape measure or ruler, a pencil and your normal cycling socks. Check that the paper cannot slide.
Measure both feet in the same conditions. Ask for help if bending down significantly shifts your weight while you draw the outline.
-
Rest your heel lightly against the wall and stand comfortably. Mark the end of your longest toe. Measure perpendicularly from the wall in millimetres.
Repeat for each foot and record left and right separately. An inconsistent repeat means measuring again, rather than selecting the result you would prefer to use.
-
Mark the widest part of the forefoot. Keep the pencil as upright as possible and measure between the marks. Record length and width together, perhaps beside the shoe model in your notes.
Compare only with charts explaining how their dimensions were measured. Do not add several separate allowances without checking the manufacturer's instructions.
-
Try the model with your own socks and usual insoles, if applicable. Fasten firmly without excessive tightening. Check heel support, toe room and pressure over the instep.
Walk briefly and adopt a riding position where safe. Do not buy a pinching shoe expecting a later saddle adjustment to resolve its fit.
-
Test a change to closure tension or insole separately over two or three easy rides. Record the location and onset of symptoms. Revert if pressure increases or the foot becomes less stable.
Keep your previous settings and avoid changing cleats, saddle height and shoes together. This makes the comparison easier to interpret.
-
Use bike fitting alongside shoe assessment, not as shoe-sizing advice. Stop for numbness or increasing pain. Pain at rest, night pain, swelling or radiating tingling calls for medical assessment.
Have recurring symptoms checked after three or four careful adjustments. A fitter can examine pedal contact, but a suitable shoe remains the foundation.
Further reading
Cycling pain: choose your first step helps distinguish pressure during a ride from symptoms for which you should seek help.
Bike fit tall riders: where to start explains why height cannot replace separate measurements of different parts of the body.
Bike fit riding styles places footwear and pedal contact in the context of your terrain and riding goals.
The bike fit calculator offers a starting point for your whole position; it does not prescribe shoe size or assess foot symptoms.
Frequently asked questions
Should I measure with socks or without them?
Measure and try shoes with the socks you normally wear while cycling, unless the sizing chart specifies otherwise. Record that choice with your measurements. Do not silently switch between thin summer socks and thicker pairs, because you would then be comparing different conditions in the same shoe.
Should I always choose the size of my larger foot?
The larger length and width provide important starting points, but check the fit of both feet. The shoe must also support the smaller foot without excessive tightening. Discuss a substantial difference with a specialist. A size number alone cannot always accommodate differences in foot shape.
How much room should I leave in front of my toes?
Follow the fitting instructions for the specific model. No single allowance works for every last, closure and foot. Check that toes are not compressed while your heel remains secure. Do not compare measured foot length directly with the outside dimensions of the shoe itself.
Will a larger shoe resolve a burning forefoot?
Only if fit is actually responsible, which one symptom cannot establish. Added length may introduce movement while the sides remain tight. Check shape, closure and pedal contact. Persistent pain or numbness needs assessment rather than a succession of larger sizes chosen without understanding the underlying problem.
This guide covers one part of your riding position. Read how bike fitting connects your measurements and bike setup.
Check the starting points of your whole riding position alongside shoe fit.
Start the bike fit calculator